Critical RC Severe Duty Float Mounts and Repair Kit Installation
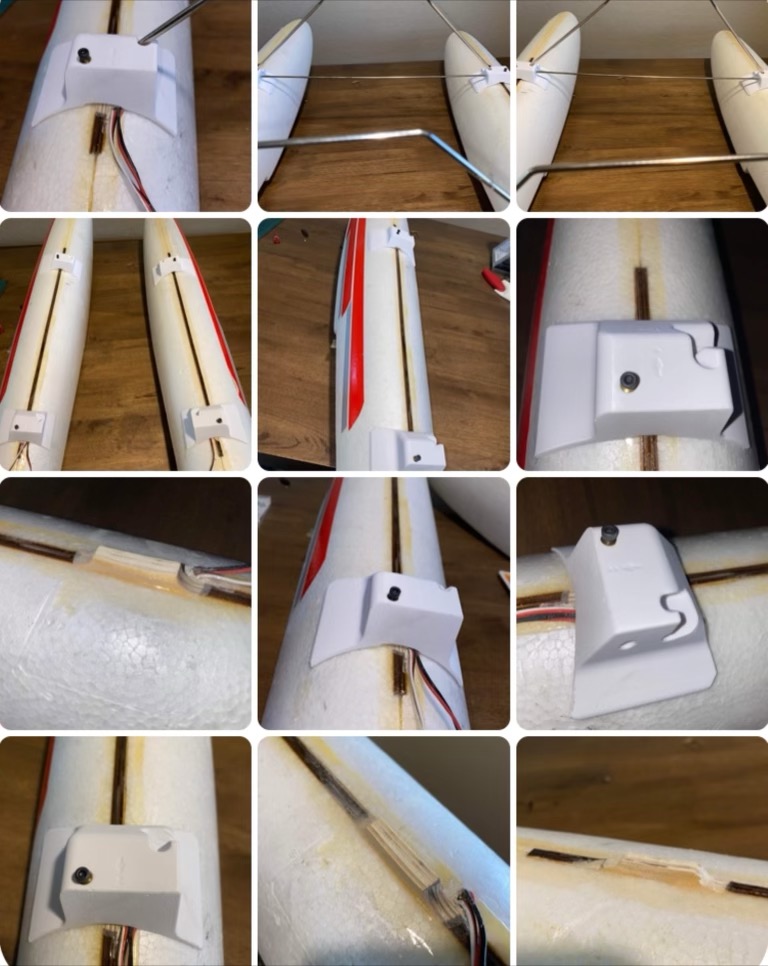
Sand all original float plywood tabs down below the original strut mounting holes. Sand the bottom corners of each plywood tab at the base with a dremel sanding drum. Test mount each float mount to insure they fully seat to the curvature of the float. The rear mounts have an arrow and 2 hash marks molded in them. The hash marks go towards the back of the float and arrow points to the aft of each float. The set screw will be to the outboard of each float. The wire retaining holes to the inboard side and the stickers on the floats will be to the outboard side as in stock configuration.
There’s a slot that each wire fits into in bottom of mount to allow float mount to sit flush against float. Please insure the float mount is completely flush before gluing and grind anything off plywood to make that happen.
The forward float mounts have an arrow and a single hash mark. The arrow points forward and the set screw is to the outboard side of the float which is the sticker side. Both spreader wire holes go to the aft side of each forward and aft gear wire leg.
Use either E6000 glue, foam Tac, epoxy or thick super glue and glue each mount onto float. Tape edges and let dry.
Find the flat on each spreader bar and slide in to hole with set screw. You must pull spreader wire back out a small amount so the screw can tighten on the flat but please insure the screw has tightened on the flat. Use locktite on the screw.
Completely assemble the float mounting wires and spreader wires onto the floats first then install into the fuselage bottom. The tension of mounting wires against the float mount is what locks everything together.
Thank you for buying my product and now the floats will actually stay at the correct angle always with no deviation! You will see a huge improvement.
Any questions please call
Bryce Hatfield
602-620-6855